

Ready to learn more about maximizing your skill with a smartphone camera?
Part one focused more on photography techniques, but now let’s turn our attention to our camera apps and the settings therein.
Metering
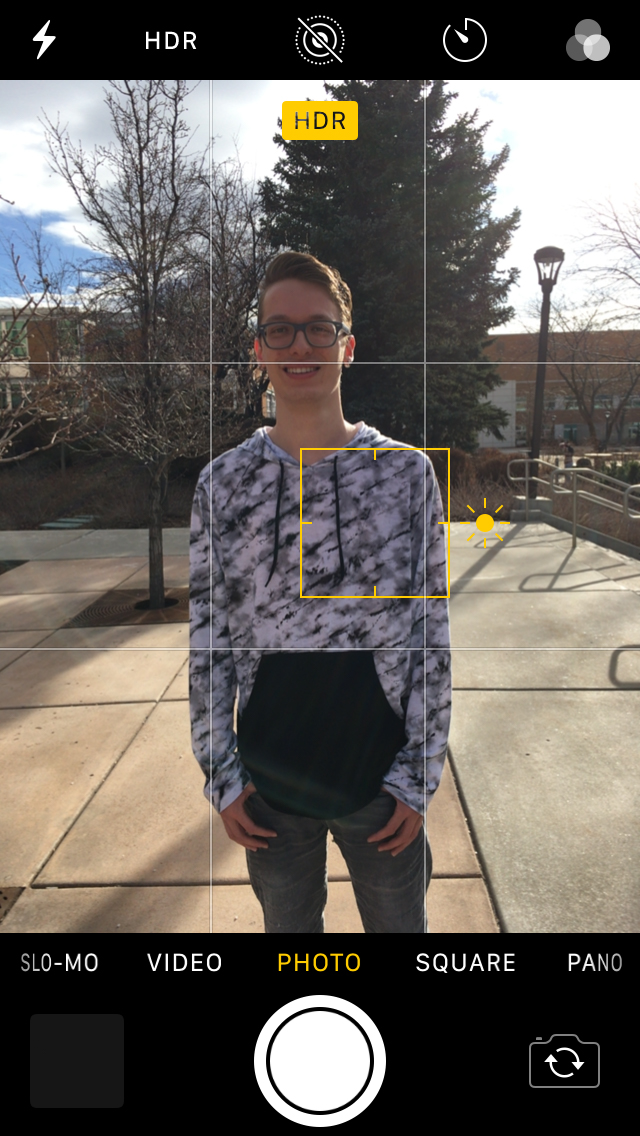
Metering refers to how the camera reads the light coming through the lens and how it reacts to that light.
Your camera app does two things, usually, when you touch the screen: focuses and meters. If you touch the brightest part of the scene, everything becomes darker.
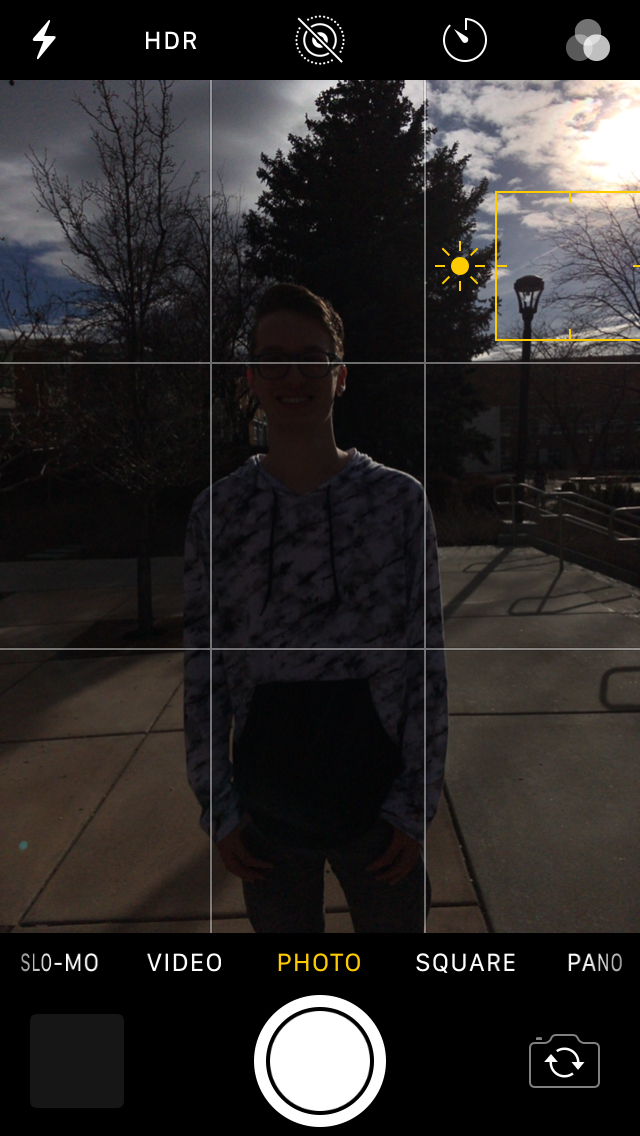
Nine out of ten times, with a smartphone, it is best to meter for the midtones. This means finding a part of the scene that is between darkest shadows and brightest highlights.
Once you’ve done this, it’s time to edit.
Editing the Light
The first thing you’ll want to do is download Lightroom. It’s free, and it gives you access to all the settings you’re likely to need.
Once you open a photo you’ve taken or imported, at the bottom there will be a few different options. Tap on ‘Light’.
Exposure is one to generally avoid, if you’ve metered properly. Instead, try increasing the contrast, which is the difference between the darkest and lightest parts of the photo.


If your highlights are blown, turn them down enough to make them less harsh.
White Balance
White balance, located under the ‘Color’ heading, is how the sensor reads neutral colors.
If you’ve ever seen a photo where the whites were either slightly blue or yellow, it is because the white balance was not corrected properly.
Lightroom has a tool to help select the proper white balance, found by pressing the button that looks like an eye dropper.
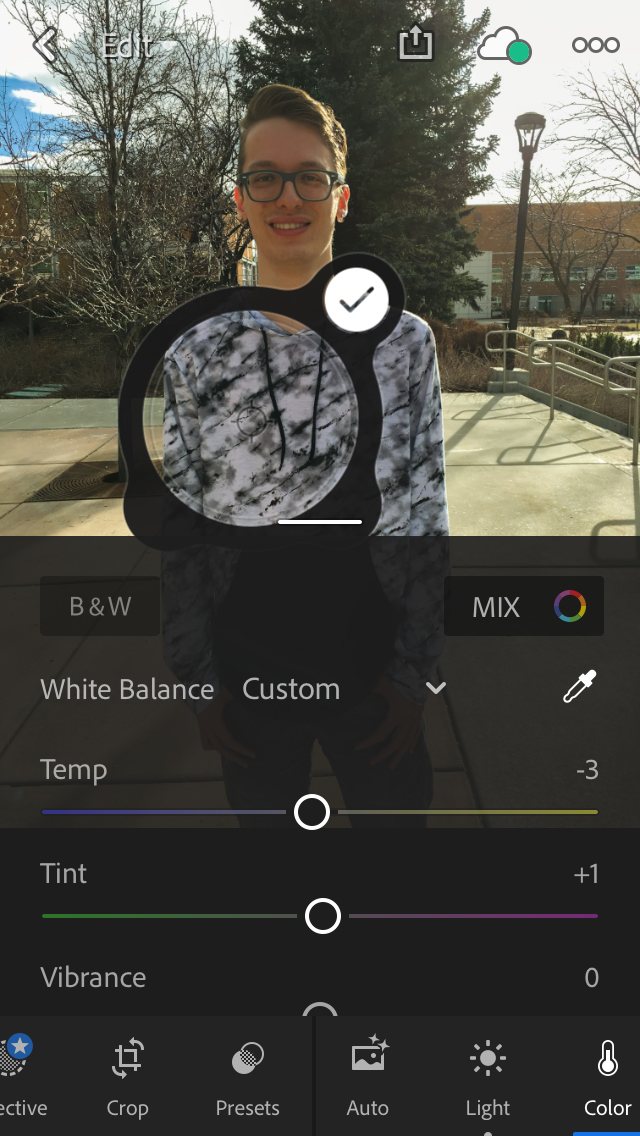
Settle it over a neutral grey color, press the check mark, and it should usually be either the proper white balance or at least close.
Show Us What You’ve Learned!
Find us on Instagram, @wsusignpost, or use the hashtag #signpostphototips to show us if your photography has improved to possibly be featured on our page.