

BriElle and Robert are photographers with The Signpost at Weber State University in Ogden, Utah. Now that school is out for summer, they have time to practice their craft and share with readers what they are working on.
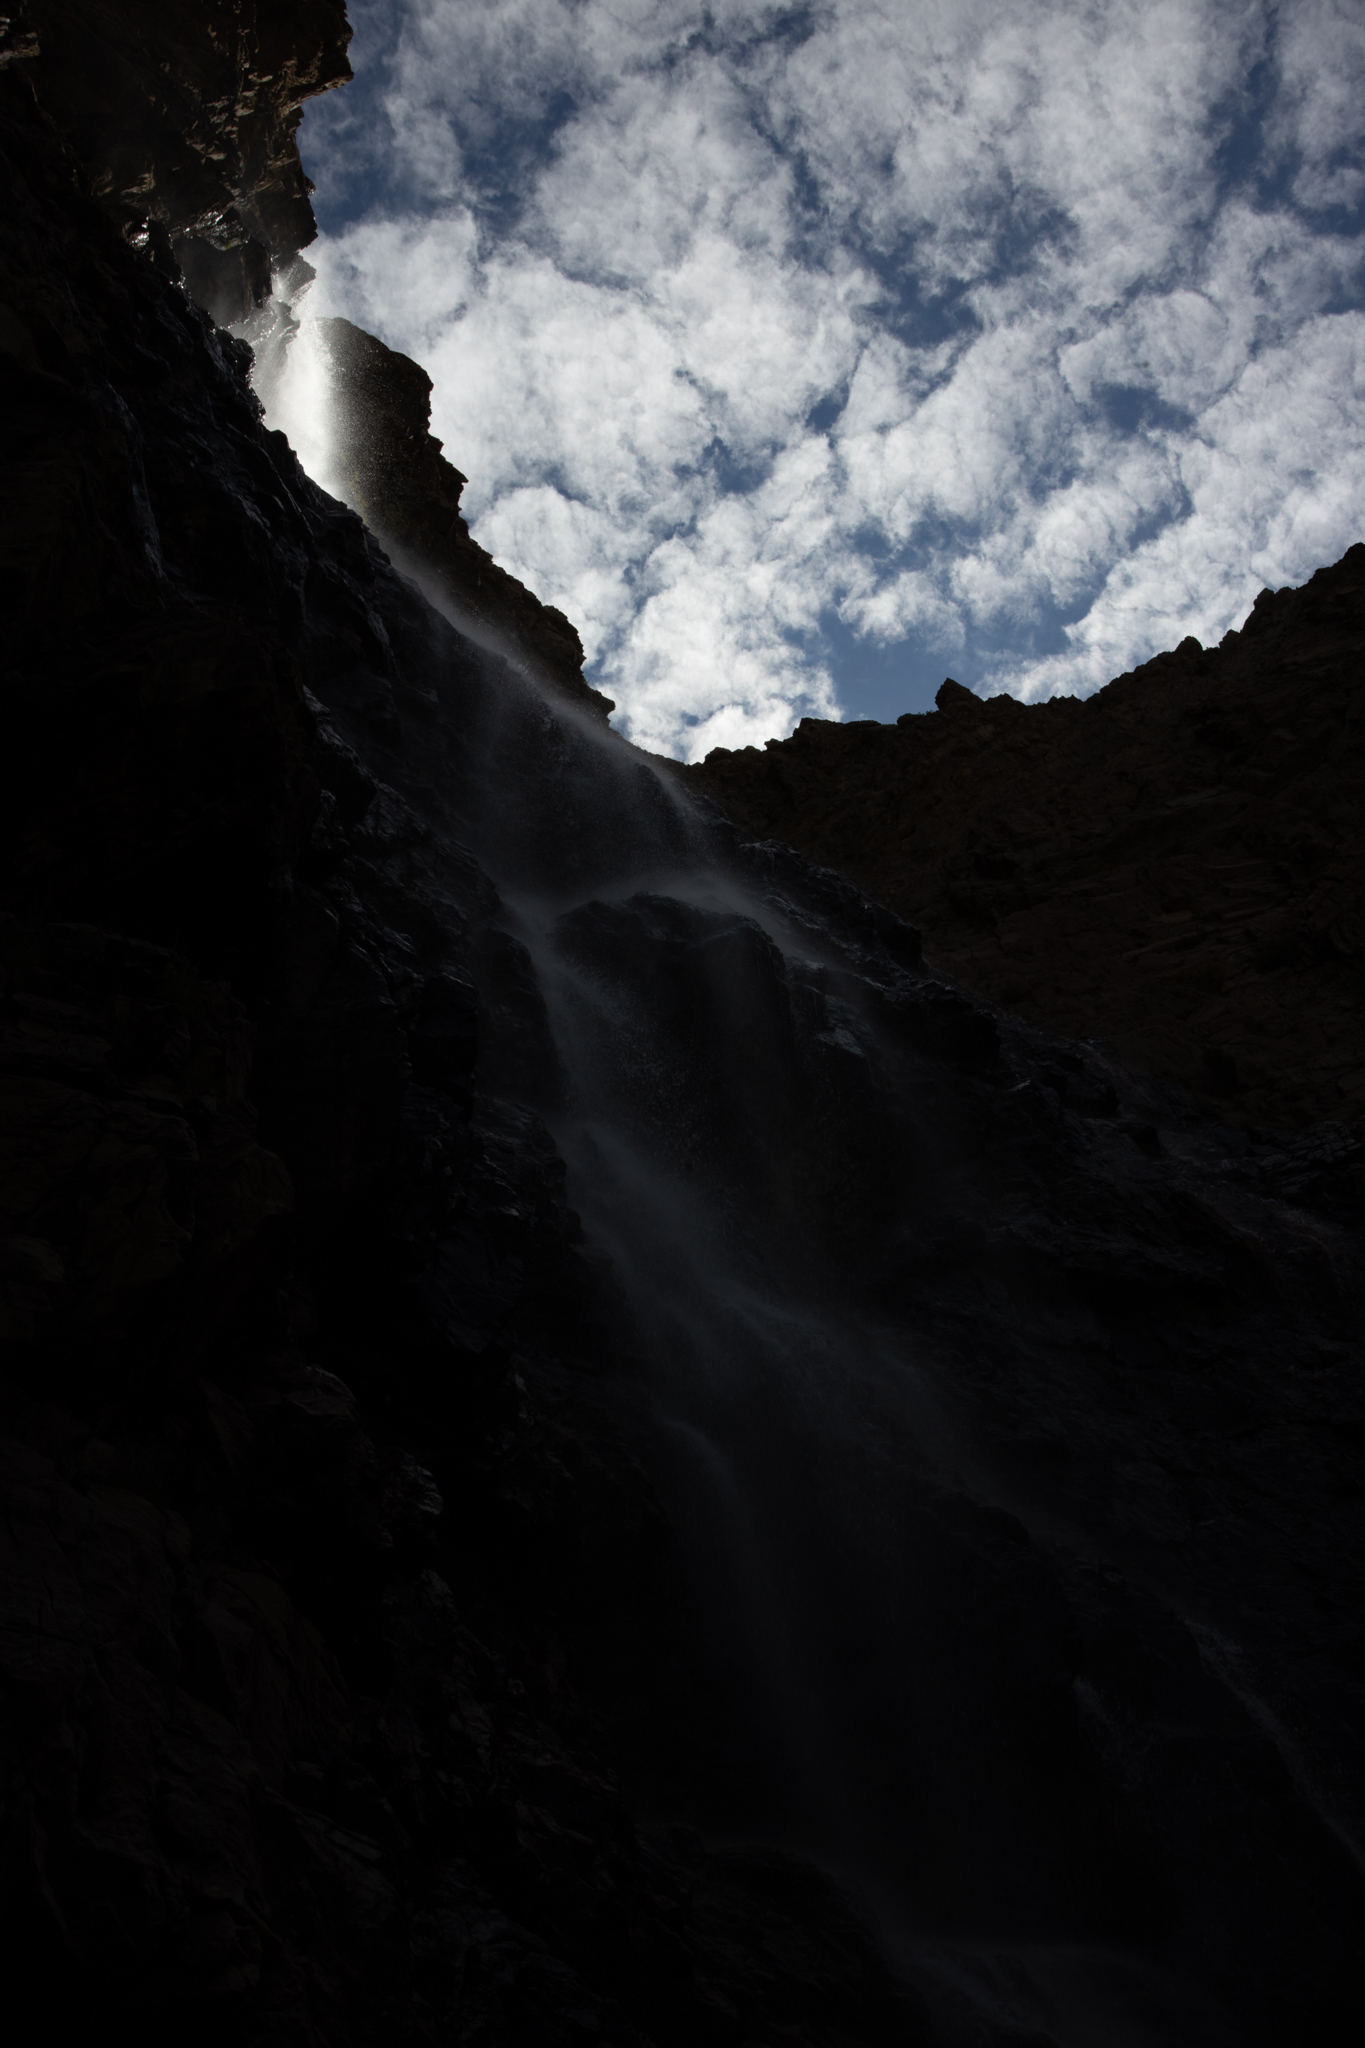
Hi everyone, I’m Robert. Today, I brought my camera along when I went for a hike on Waterfall Canyon Trail in Ogden, Utah. I wanted to try the High Dynamic Range mode on my Canon EOS R to photograph the waterfall. Previously, I tried to take a photo of it, and when I focused near the sky, the camera underexposed the waterfall. The opposite happened when I focused on the waterfall — the sky was overexposed.
In David Busch’s Canon EOS R Guide to Digital Photography, he mentions using HDR to improve the chances of getting a properly-exposed image by having the camera do all the work. It takes a series of three photographs at different shutter speeds to obtain different exposures. One photo is underexposed to capture the bright areas. Another is overexposed to capture the shadows and one is exposed for the mid tones. The camera combines all three RAW images to form a JPEG image.
The camera also has five HDR effects to choose from. Natural, art standard, art vivid, art bold and art embossed. Today, I wanted to apply art vivid to my photographs.
So, after hiking to the waterfall I took a seat on the most comfortable boulder I could find, pulled out my camera and got ready.
The camera setup was not difficult. In the menu under the camera settings, I set HDR mode to Auto, Effects to Art Vivid, returned to the menu and exited out to the normal shooting screen. A tripod is recommended, but I handheld the camera.
With a push of the shutter button there were a series of rapid clicks, a busy signal for a few seconds while the camera processed the images …
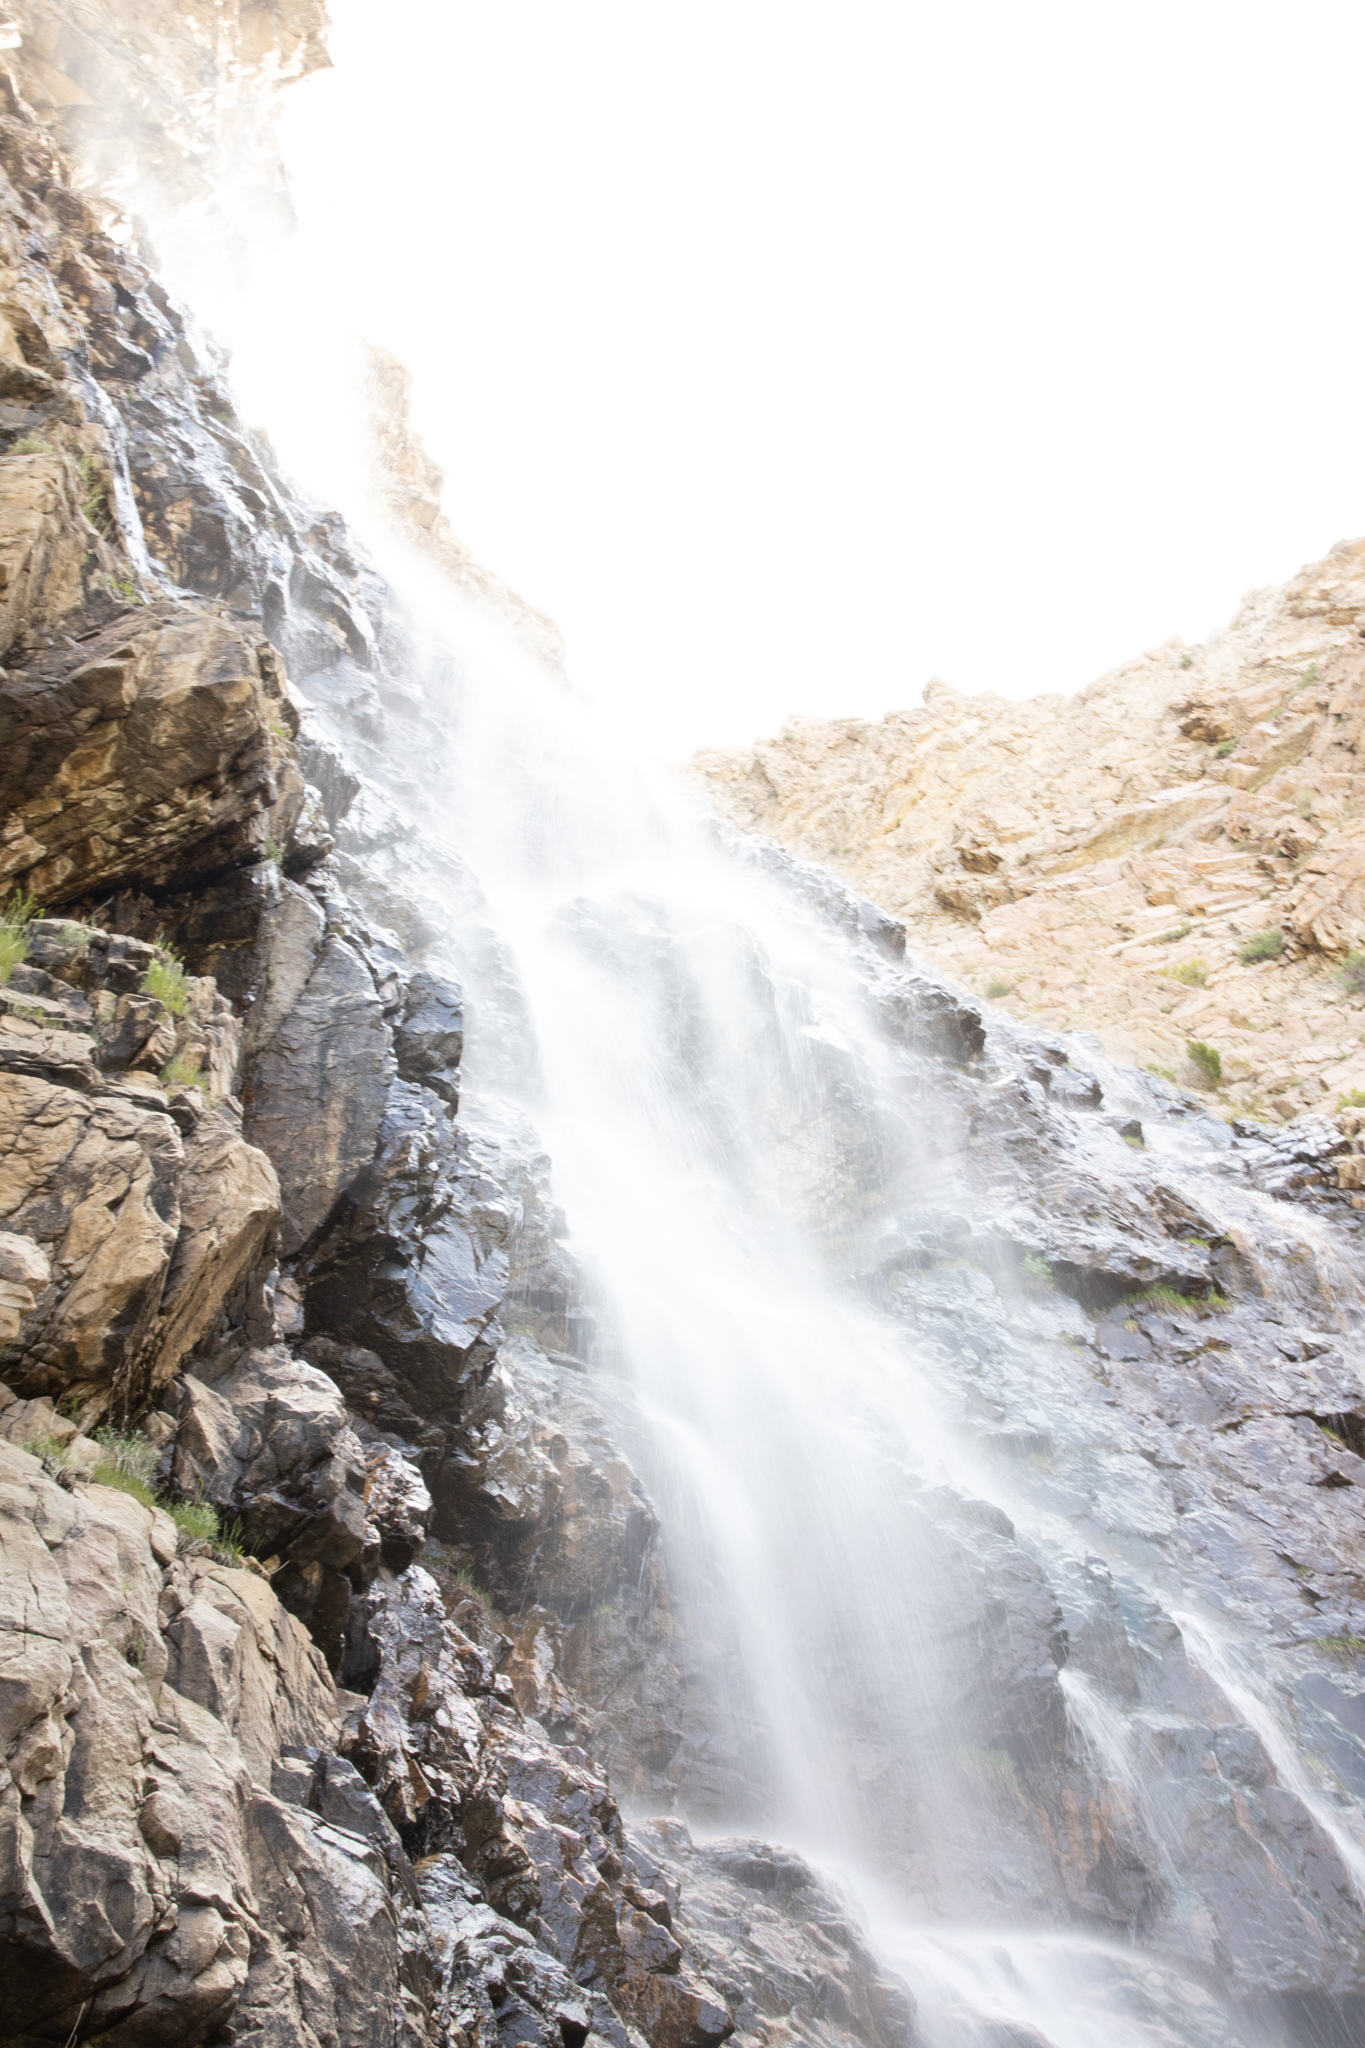
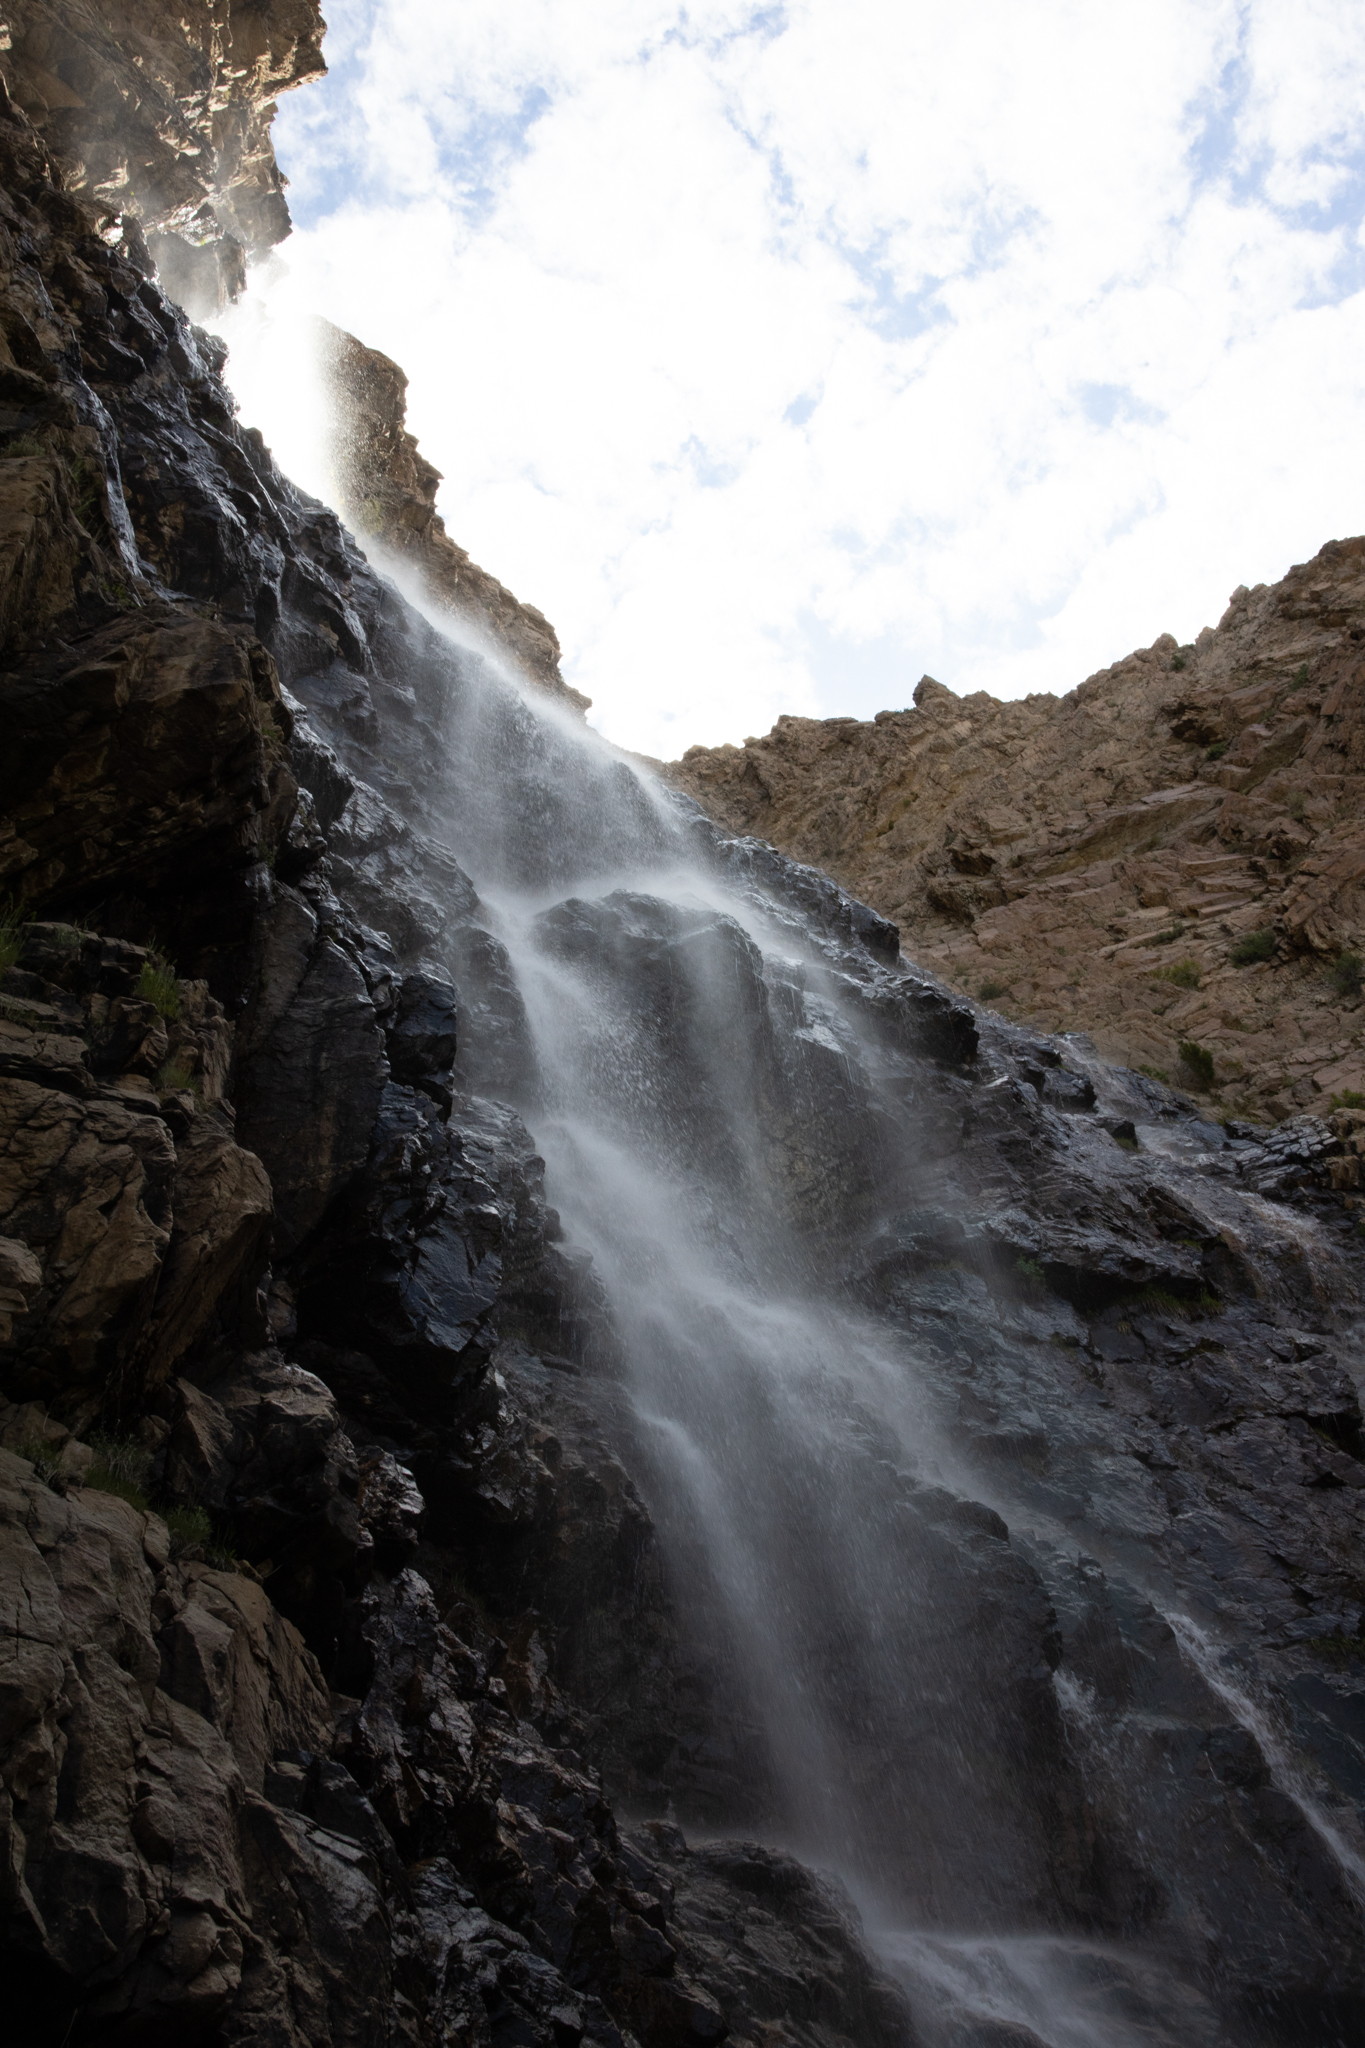
…and voila.

I like the results and found it was simple to do. I didn’t do any post processing. The camera does it for you.
Art Bold is next on my list. It applies more saturation than art vivid, giving a photo an “oil painting” effect. And now that school is out for summer, I’ll just have to find the scenery for applying that effect.
Hi, I’m BriElle. While I have been staying home during quarantine, I have been experimenting with different styles of photography. I found macro photography interesting.
Macro photography involves taking closeup pictures of parts of an object instead of a standard photo that portrays the entire object. There are multiple ways to achieve these photos. The first and easiest way is to buy a macro lens. It will allow you to zoom in very close and take a photo. This route is also the most expensive.
Two cheaper options are to use either extension tubes or macro bellows. Both of these are attachments that you can buy for your camera that go between the body of the camera and the lens. They extend the space between your lens and the sensor in your camera, making the objects appear closer.
The last and cheapest way to take a macro photo is to simply turn your lens around and shoot through it reversed. The lens already acts as a magnifying glass. So, this method just uses this to your advantage. If this is your preferred style, you can also buy a reversing ring that allows you to attach the lens to your camera.
For my macro photos, I used two different methods. First, I used three different extension tubes combined: a 36 millimeter, a 20 millimeter and a 12 millimeter, along with my 18 millimeter- 55 millimeter zoom lens. These photos produced a wide depth of field while still keeping a lot of detail.


Second, I used only my 18 millimeter- 55 millimeter zoom lens turned around. I found this difficult to focus on an object. I could not simply use the focusing ring on the lens. Instead, I had to physically move the camera closer or farther away to achieve the right focus. Even with this, I still found that they took wonderful macro photos and captured a lot of little details.


There are always different types of photos that one can take and achieve different results. Next time you are thinking about what photos you should take, try one of these techniques and maybe you will fall in love with this process.